Serial number popup for returns

Serial numbers can be stored via the product master, which are checked separately for returns. If a serial number is scanned from the list, a note is displayed that can be entered via the product master.

The following screenshot shows the setting in the product master:

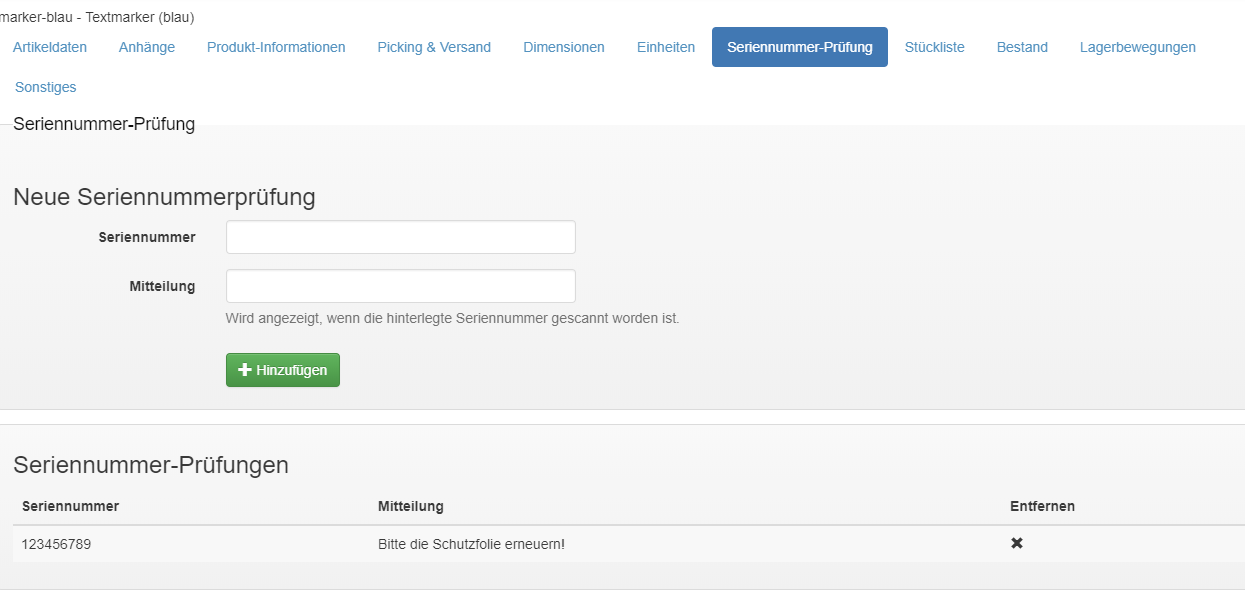
The X button can be used to remove a serial number check. Serial numbers are unique. This means that by entering a serial number that has already been stored, the previous entry is overwritten.

When a return is scanned and a stored serial number is entered, the specified message appears as follows:


article characteristics

Article characteristics can be created in the client master. The standard feature is intended for determining the condition, such as 1st choice, B-goods etc.. In addition, there is a characteristic Packaging to indicate the state of the packaging and a characteristic function, which can be set after a function test.

The standard feature is set directly when returns are accepted. It can also be changed during stock transfer and can be seen in the stock views.

The packaging and function features can be seen and changed via a special refurbishment mask. A technical employee can use this screen to set the corresponding characteristics and store a comment. The packaging feature can be set when scanning a return if the user is assigned the refurbishment module. However, it is not displayed in the position, but exclusively via the refurbishment mask.

The individual characteristic groups can be set via a corresponding selection box. The characteristics are all displayed in a mask for the client, but they are displayed grouped according to group in the table.

Each group can have a standard feature.


Create return

Return orders can be created via “Warehouse management – > Retour”.

Return_Tab

First select a client and a warehouse, then use the reference number to search for a goods issue order and mark it for return. If the reference number is known, the remaining data is added automatically, otherwise you must enter it manually.

Return_new

Also specify a return date.

Return_new2_Date

You will now be prompted to enter the barcode of a current “goods issue order”. Alternatively, you can click on the blue text below and select the order from a list of current orders. Confirm your entry.

Retour_neu3_Positions

Now click on “Confirm”.

Retour_neu4_Save

Finally, click “Close Job” to complete the procedure. Your record is now saved.

Retour_neu5_Close