fast send

With the help of the Fast Send function, Single Pick outgoing goods orders without storage, Pick & Pack can be booked as packed directly at cross-docking goods receipt. The goods to be scanned must already have been notified. The Single Pick outgoing goods orders waiting in the system for goods can be served via a Fast Send view, in which first the goods receipt and then the WA products are scanned.

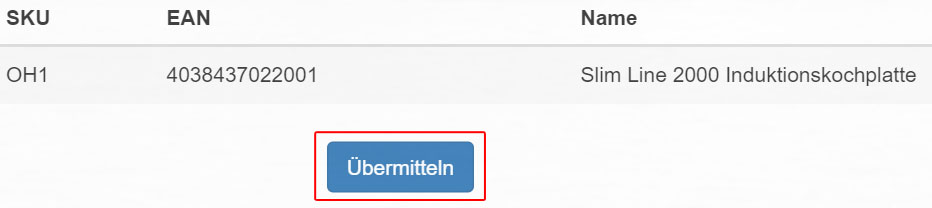
Wemalo will then book the goods at a cross-docking location, reserve them for the goods issue order and then pack them. The shipping label is printed and the package can be transferred directly to the goods issue.

In wemalo Fast Send is integrated as a module and must be enabled at user level.

workflow

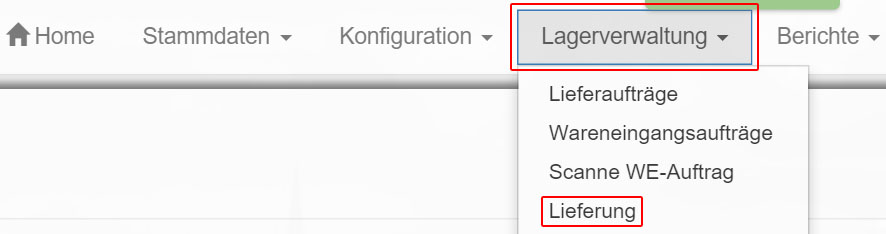
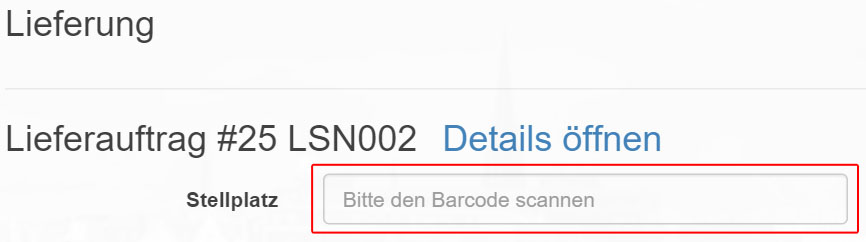
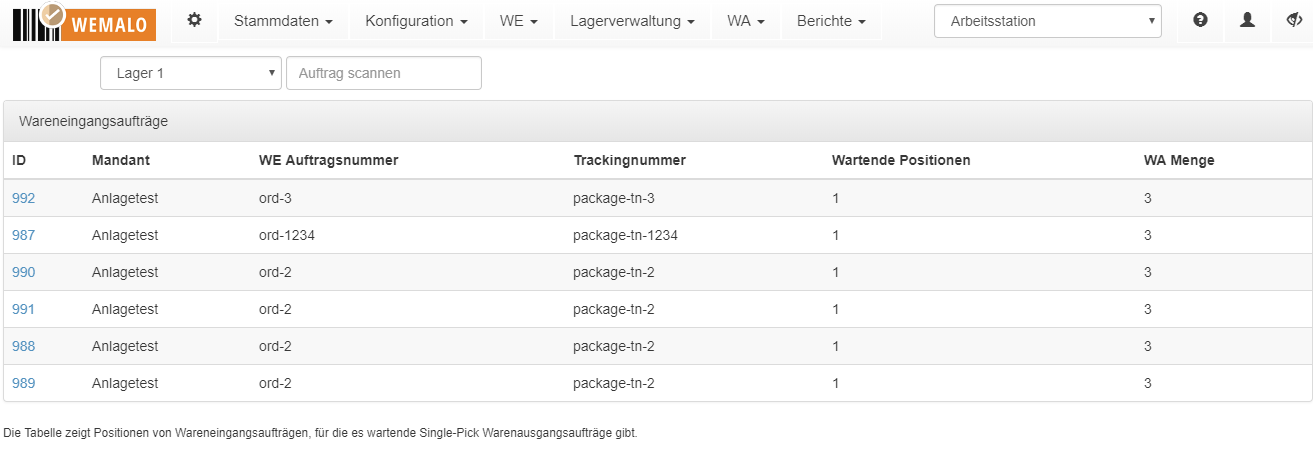
  1. Fast Send view shows notified goods receipts for which there are waiting goods issues
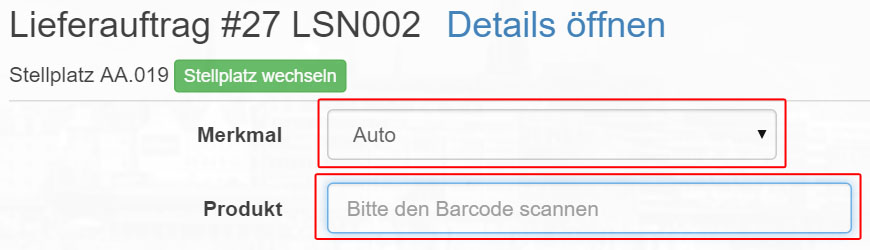
  2. After Scan WE, the products are scanned

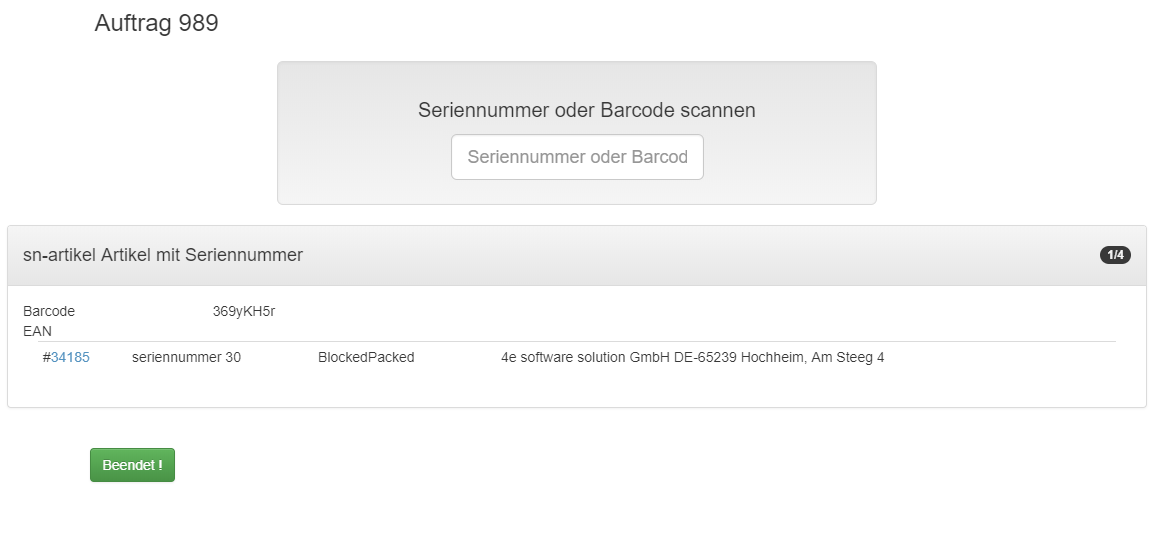
When scanning the products, the user first gets a list of all products for which there are waiting orders. In the above example it is only one product. For this product, there are four waiting goods issue orders (identified by the number 1/4 on the right, where the item has already been scanned once).

conditions

  • It must be min. a packaging material has been defined for the client. If there is a VP with the name Default, it is used.
  • The system only lists notified goods receipt orders for which min. An article matches an incomplete Single Pick goods issue order.
  • When scanning the goods receipt, the advised tracking number or the client order number can be scanned. Ideally, one of both codes can be scanned on the WE package.
  • The use of serial numbers at product level is recommended for a clear WA assignment. These can be scanned in the 2nd workflow step as an alternative to the product barcode.


Pick Overview

Via “Warehouse management – >Pick overview” you can display lists with all created “Picklists”.

Pick-Overview_Tab

You are now in the tab “Order picklists”.

Pick-Übersicht_1_Übersicht

Um eine “Pickliste” bearbeiten zu können, klicken Sie auf das “bearbeiten”-Symbol hinter der jeweiligen “Pickliste”.

Edit_Manufacturing_Orders_Actions_Edit_Actions

You can now enter a person responsible for the order here. As well as mark an automatic sorting of the “pick order”.

Pick_Overview_1_Overview2

Finally click on “Save”.

Save2


Process goods issue orders

Via “Warehouse Management – >Goods Issue Orders”, you reach a list with all “Goods Issue Orders”.

Goods Issue Orders_Tab


To edit an existing order, click on the “Edit” icon behind the order in the “Actions” column.

Process_goods_issue_orders_1_01_


The fields “Client”, “Warehouse” and “Client order number” are required to be able to reserve “products” for an “Order” at all.

Remember that an order can only be assigned and processed properly if the delivery and address data has been entered.

Goods Issue Orders_1_Edit_11_products_add9

The order is considered “incomplete” if no recipient and address data are specified and cannot then be processed. Fill in at least these marked fields:

Goods Issue Orders_2_Edit1_Create

Goods Issue Orders_2_Edit_2_Create

After you have filled in the required fields, click on “Order Item”.

Process_goods_issue orders_1_2

You will now be asked to add “products” of the previously selected “Client” to your order.

Search for the desired product using the text field. Possible search criteria are “SKU”, “Article name”, “Barcode”, “EAN”, “Size” and “Design number”.

Goods Issue Orders_1_Edit3_products_add

All “products” of the “Client” are now displayed. Add a “product” to the delivery by entering the quantity in the “Auto” column and clicking on the green symbol behind the input field.

Goods Issue Orders_1_Edit_4_products_Add2

Alternatively, you can also reserve “products” in an order via the detailed view of a “product”. To do this, click on the blue circle symbol in the “Show details” column behind a “product”.

Goods Issue Orders_1_Edit5_products_Add3

Here you can reserve the “product” automatically or on the basis of a “feature”.

Goods Issue Orders_1_Edit6_products_add4

Then enter the desired number of “products” to be reserved for the order.

Goods Issue Orders_1_Edit7_products_Add5

With one click on “Add.” Item information, additional information such as an “order date” or a “unit price” can be added to the reservation.

Goods Issue Orders_1_Edit8_products_Add6

Click on “Add” to reserve the “product” in the order and then on “Close” to return to your created order.

Goods_Issue_Orders_1_Edit9_products_add7

Goods_Issue_Orders_1_Edit_10_products_add8

Click on “Save”.

Save2

You will now see a summary of your processed order.

Now you can also have a “picklist” created for your order.

To do this, click on the tab provided.

Goods_Issue_Orders_2_Edit_4_Create3

Now enter a responsible person and click on “Save”.

Processing_goods_issue_orders_2_5_Picklists


Create goods issue orders

Via “Warehouse Management – >Goods Issue Orders”, you reach a list with all “Goods Issue Orders”.

Goods Issue Orders_Tab

Click on “New Order” in the upper left corner to create a new “Goods Issue Order”.

Inventory orders_new1

The fields “Client”, “Warehouse” and “Client order number” are required to be able to reserve “products” for an “Order” at all.

Remember that an order can only be assigned and processed properly if the delivery and address data has been entered.

Goods_Issue_Orders_1_Edit_11_products_add9

The order is considered “incomplete” if no recipient and address data are specified and cannot then be processed. Please fill in at least the fields marked below:

Goods Issue Orders_2_Edit1_Create

Goods_Issue_Orders_2_Edit_2_Create

After you have filled in the required fields, click on “Order Item”.

Process_goods_issueorders_1_2

You will now be asked to add “products” of the previously selected “Client” to your order.

Search for the desired product using the text field. Possible search criteria are “SKU”, “Article name”, “Barcode”, “EAN”, “Size” and “Design number”.

Goods Issue Orders_1_Edit3_products_add

All “products” of the “Client” are now displayed. Add a “product” to the delivery by entering the quantity in the “Auto” column and clicking on the green symbol behind the input field.

Goods Issue Orders_1_Edit_4_products_Add2

Alternatively, you can also reserve “products” in an order via the detailed view of a “product”. To do this, click on the blue circle symbol in the “Show details” column behind a “product”.

Goods Issue Orders_1_Edit5_products_Add3

Here you can reserve the “product” automatically or on the basis of a “feature”.

Goods_Issue_Orders_1_Edit6_products_add4

Then enter the desired number of “products” to be reserved for the order.

Goods Issue Orders_1_Edit7_products_Add5

With one click on “Add.” Item information, additional information such as an “order date” or a “unit price” can be added to the reservation.

Goods_Issue_Orders_1_Edit8_products_Add6

Click on “Add” to reserve the “product” in the order and then on “Close” to return to your created order.

Goods_Issue_Orders_1_Edit9_products_add7

Goods_Issue_Orders_1_Edit_10_products_add8

Finally click on “Save”.

Save2

You now see a summary of your newly created order.

Now you can also have a “picklist” created for your order.

To do this, click on the tab provided.

Goods_Issue_Orders_2_Edit_4_Create3

Now enter a responsible person and click on “Save”.

Processing_goods_issue_orders_2_5_Picklists


Edit warehouse order

Via “Warehouse management – > delivery” you reach a list with all “delivery orders”.

Delivery_Rider1

In the “Actions” column, click the “Edit” icon behind the “Delivery Order” you want to edit.


Edit_delivery_actions2

Edit_Delivery_Actions1


First select a “client” and then enter the “delivery note number”.

Then click on “Save”.

Save2

You will now be prompted to enter the holding space number or to scan the barcode of the parking space. Confirm your entry.

delivery_new3_barcode_scanning_Stellplatz

Now you are asked to scan the barcode of the product or you enter the “article number” manually. Confirm your entry.

The field “Characteristics” is optional.

Delivery_new5_Barcodescanning_product

Finally, click on “Submit” to transfer the modified data record to the system.

Lieferung_neu6_Daten_übermitteln


Create warehouse order

Via “warehouse management – > delivery” to a list with all “delivery orders”.

Delivery_Rider1

Click on “New Delivery Order” to create a new “Delivery Order”.

Delivery_new1

First select a “client” and then enter the “delivery note number”.

Then click on “Save”.

Save2

You will now be prompted to enter the holding space number or to scan the barcode of the parking space. Confirm your entry.

delivery_new3_barcode_scanning_Stellplatz

Now you are asked to scan the barcode of the product or you enter the “article number” manually. Confirm your entry.

The field “Characteristics” is optional.

Delivery_new5_Barcodescanning_product

Finally, click on “Submit” to transfer the new record to the system.


Delivery_new6_Data_transfer