client setup

If a new client is set up in the system, a number of settings must be made. These include

  • Creating the client in the client master (see also Creating Clients)
  • Storage of shipping profiles (see also Creating Shipping Profiles)
  • If necessary, create packaging material (see also Creating Packaging Material).
  • Configure clients in the client master: store characteristics and return reasons, activate services, settings, picking, shipping, and documents if necessary. Under Shipping, for example, you must activate all shipping profiles that are to be taken into account during automatic selection of the shipping profile.
  • The data exchange must be set up: this takes place either in Wemalo via the data exchange (Plentymarkets, Magento, WooCommerce) or via wemalo-connect (Shopware, Shopify, REST-API). The client ID and warehouse ID are required for wemalo-connect.
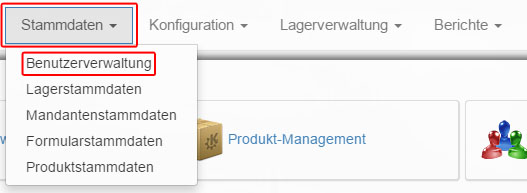
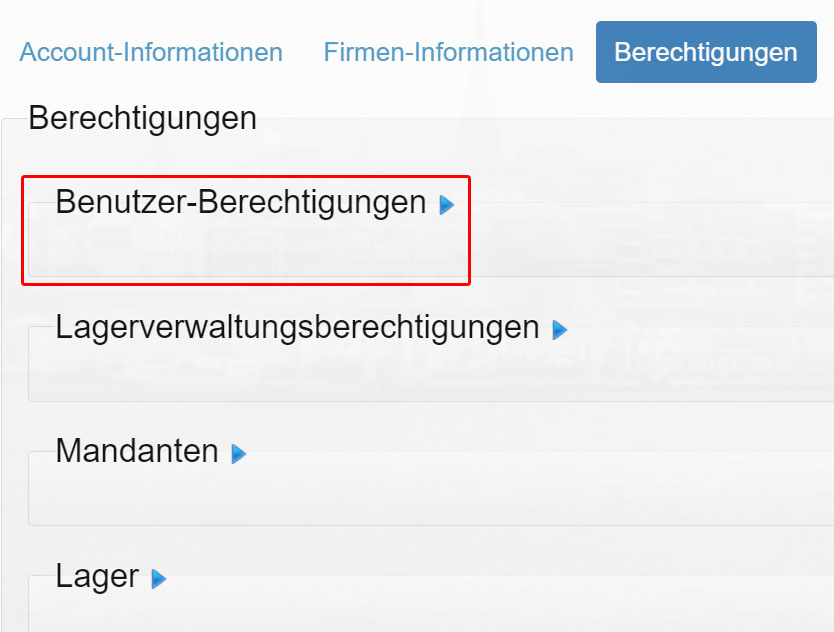
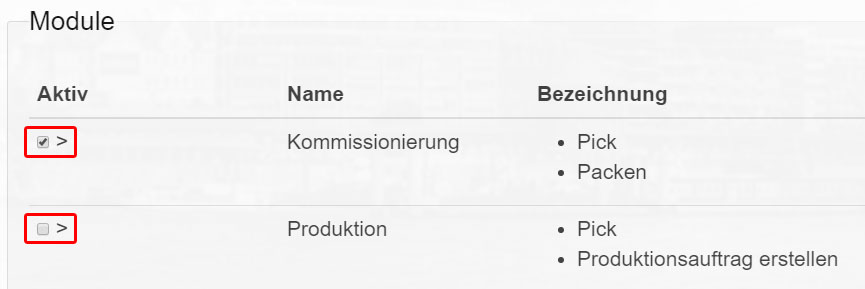
  • The authorization for the client must be stored with the relevant users.


rights management

Via “Master data- >User administration” you reach a list in which all known users are listed.

Tab_Master data_User administration

If the list is too confusing, use the “Filter” to restrict the displayed results.

One “user” per line is always displayed. Click in a row to be able to edit the record for a “user”.

User administration_2

You will now see several tabs above your “Account Information”, click on “Permissions”.

rights management-2

Select the authorization to be edited with a mouse click. You can choose between user authorizations, warehouse management authorizations, clients and warehouses. Here is an example of user permissions:

rights management-3

Under “User Permissions” you can remove the previously selected user’s rights to edit other users with Remove or set the check mark or Give.

rights management-4

To accept the changed data set, click with the mouse on the “Save” button below, to the left of the checkbox.

module management-4


module administration

Via “Master data- >User administration” you reach a list in which all known users are listed.

Tab_Master data_User administration

If the list is too confusing, use the “Filter” to restrict the displayed results.

One “user” per line is always displayed. Click in a row to be able to edit the record for a “user”.

User_administration_2

You will now see several tabs above your “Account Information”, click on “Modules”.

module_management-2

To assign or remove “modules” to your selected “user”, remove or set the check marks to the left of the module name and module description.

module_management-3

Finally, click on the “Save” button at the bottom left to accept the changed data record.

module_management-4


master data

All data on users, warehouses, clients, forms and products can be viewed via “master data”.

Tab_Master data

Here you can edit existing data records or create new ones.